

- Philosophy: Prevention is Better than Cure
- Part 1: Daily and Routine Maintenance
- A. Daily Maintenance (Before Start of Work - 5-10 Minutes)
- B. Weekly/Monthly Maintenance
- C. Annual Maintenance (Recommended by a Professional)
- Part 2: Common Problems and Repair Troubleshooting
- Part 3: Safety First!
- When to Call a Professional Technician
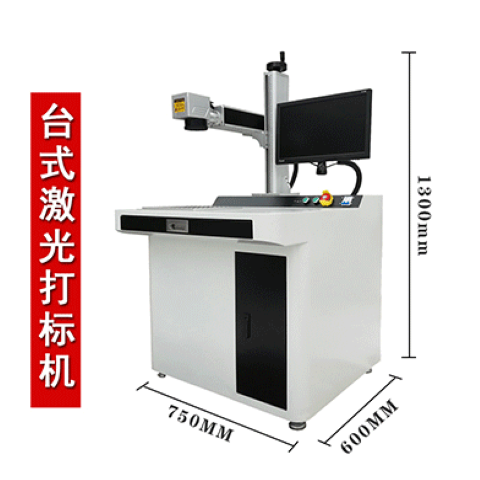
Of course. Here is a comprehensive guide to the daily maintenance and repair of a fiber laser marking machine, structured for clarity and practicality.
Philosophy: Prevention is Better than Cure
The most effective and cost-efficient approach to owning a fiber laser marker is consistent, proactive maintenance. Neglecting simple daily tasks can lead to costly downtime and major component failures.

Part 1: Daily and Routine Maintenance
This is the cornerstone of keeping your machine running smoothly.
A. Daily Maintenance (Before Start of Work - 5-10 Minutes)
Clean the Lens (Focal Lens):
Why: Dust, smoke residue, and contaminants on the lens will scatter the laser beam, drastically reducing marking power, causing faint marks, and potentially damaging the lens itself.
How: Use a lens cleaning solution (or high-purity, >95% isopropyl alcohol) and lint-free swabs or lens tissue. Gently wipe in a spiral motion from the center outwards. Never use abrasive materials or excessive force.
Clean the Galvo Window (Protective Window):
Why: This window protects the internal scanning galvanometer mirrors from the processing environment. If it gets dirty, it has the same negative effect as a dirty focal lens.
How: Same method as cleaning the focal lens. Inspect it for any splatter or coating.
Check Chiller Unit:
Ensure the chiller is ON and running.
Check the temperature setting (usually between 20-25°C, consult your manual).
Verify the water level is within the recommended range.
Listen for unusual noises from the pump.
Why: The laser source generates heat and must be kept at a stable temperature. Overheating is a primary cause of laser source degradation.
How:
Visual Inspection:
Check all cables (power, data, water lines) for any signs of damage or wear.
Ensure the work area is clean and free of obstructions.
B. Weekly/Monthly Maintenance
Clean the Exhaust Fan & Air Vents: Dust buildup can cause the fan to fail and the machine to overheat. Use a vacuum or compressed air to clean the vents and fan blades.
Inspect the Chiller Water (Monthly/Quarterly):
Check for algae growth or discoloration. The water should be clear.
Use deionized water or distilled water only. Tap water will cause mineral buildup and corrosion inside the laser source and chiller.
Follow the manufacturer's schedule for replacing the coolant (typically every 6-12 months).
C. Annual Maintenance (Recommended by a Professional)
Full System Inspection: Have a qualified technician inspect the entire system.
Laser Source Calibration: Check the output power and beam quality.
Galvo Scanner Calibration: Recalibrate the scanning head to ensure marking accuracy and field correction.
Part 2: Common Problems and Repair Troubleshooting
When problems occur, follow a logical troubleshooting sequence.
| Problem/Symptom | Possible Causes | Troubleshooting & Repair Steps |
|---|---|---|
| No Laser Output / Very Weak Mark | 1. Dirty Lens or Galvo Window 2. Incorrect Focus Distance 3. Low Laser Power Settings 4. Faulty Laser Source | 1. Clean the lens and galvo window (as per daily maintenance). 2. Re-focus the laser. Use the Z-axis to find the correct focal point. 3. Check software settings. Increase power, speed, and frequency parameters. 4. Professional Diagnosis. If all else fails, contact a technician to test the laser source output. |
| Marking is Blurry or Distorted | 1. Out of Focus 2. Loose Fixturing 3. Galvo Scanner Misalignment 4. Damaged Lens | 1. Re-focus the laser. 2. Secure the workpiece firmly. 3. Run a Galvo Scanner Test Pattern (usually a square or grid in the software). If distorted, the galvos need recalibration by a professional. 4. Inspect the lens for scratches or coating damage. Replace if necessary. |
| Incorrect Marking Position | 1. Software File Error 2. Incorrect "Start Position" Setting 3. Galvo Scanner Drift 4. Mechanical Looseness | 1. Re-import or re-draw the graphic. 2. Check the "X" and "Y" start position in the marking software. Set to zero or the correct offset. 3. Power cycle the machine (turn off and on). If problem persists, galvos may need recalibration. 4. Check for loose bolts on the scanning head or mounting brackets. |
| Machine Won't Start / No Power | 1. Power Supply Issue 2. Emergency Stop Activated 3. Tripped Circuit Breaker 4. Loose Power Cable | 1. Check the main power switch and outlet. 2. Ensure all Emergency Stop buttons are released (twist to unlock). 3. Check the circuit breaker on the machine and in your facility's electrical panel. 4. Reseat all power connections. |
| Laser Source Overheat Alarm | 1. Chiller Not Working 2. Low Coolant Level 3. Blocked or Kinked Water Lines 4. High Ambient Temperature | 1. Check if the chiller is powered on and running. Listen for the pump. 2. Top up the coolant with deionized water if low. 3. Inspect water lines for kinks or blockages. 4. Ensure the machine is in a well-ventilated area with an ambient temperature below 35°C (95°F). |
Part 3: Safety First!
Laser Safety: NEVER look into the laser beam or its reflections. The beam is invisible and can cause permanent eye injury instantly. Always wear approved laser safety glasses when the laser cover is open for maintenance.
Electrical Safety: Always disconnect the machine from mains power before performing any internal repairs.
Fire Hazard: Do not leave the machine unattended during operation, especially when marking flammable materials (wood, certain plastics). Keep a fire extinguisher nearby.
When to Call a Professional Technician
While daily maintenance is an operator's responsibility, you should call a qualified technician for:
Laser Source Replacement/Repair: These are high-voltage, sealed units. Do not attempt to open them.
Galvo Scanner Replacement/Calibration: This requires specialized software and expertise.
Any internal electrical repairs beyond checking cables.
Persistent problems that basic troubleshooting cannot resolve.
By following this disciplined maintenance schedule, you will maximize the lifespan of your fiber laser marking machine, ensure consistent marking quality, and minimize unexpected downtime and repair costs.