UV Laser Marking Machine Marking on the Glass QR Code
Using a UV laser marking machine to mark a QR code on glass is a precise and efficient method, especially for creating high-contrast, durable, and permanent marks. Here’s a step-by-step guide on how to achieve this:
1. Understand the Basics of UV Laser Marking on Glass
UV Lasers: UV lasers have a shorter wavelength (typically 355 nm), which allows for high-precision marking without causing significant heat damage to the material.
Glass Marking: Glass is a brittle material, and traditional laser marking methods (e.g., CO2 lasers) can cause micro-cracks or fractures. UV lasers minimize this risk due to their "cold marking" process.
QR Code Requirements: The QR code must be clear, readable, and have sufficient contrast for scanning.
2. Prepare the Glass Surface
Ensure the glass surface is clean and free of dust, oils, or contaminants.
If necessary, use isopropyl alcohol or a glass cleaner to wipe the surface.
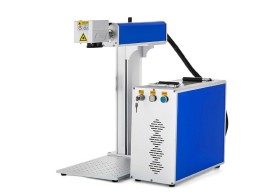
3. Set Up the UV Laser Marking Machine
Laser Parameters: Adjust the laser settings based on the type of glass and desired mark quality. Key parameters include:
Power: Lower power is often sufficient for glass marking.
Speed: Adjust the marking speed to achieve the desired contrast and depth.
Frequency: Higher frequencies are typically used for finer details.
Spot Size: Smaller spot sizes allow for higher precision.
Focus: Ensure the laser beam is properly focused on the glass surface for sharp and clear marks.
4. Design the QR Code
Use QR code generation software to create the QR code. Ensure it meets the required size and resolution for the application.
Test the QR code to ensure it scans correctly before marking.
5. Mark the QR Code on the Glass
Load the QR code design into the UV laser marking machine’s software.
Position the glass correctly under the laser head.
Run a test mark on a sample piece of glass to verify the settings and adjust if necessary.
Start the marking process. The UV laser will create a high-contrast, permanent mark on the glass surface.
6. Post-Processing (Optional)
Inspect the marked QR code to ensure it is clear and scannable.
If additional contrast is needed, consider applying a dye or pigment to the marked area (optional, depending on the application).